GL-iTeen v 0.3
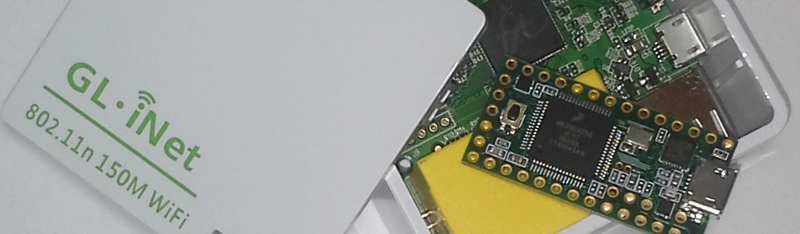
My Teensy 3.1s arrived with another GL-iNet so I can build the GL-iTeen version 0.3 (working title)! See Part 3 – The Build for my first and second attempts at adding a Teensy to the GL-iNet for the ultimate Penetration Testing weapons. Version 0.2 is a great tool but it looks like this. I’m not a perfectionist but I wanted this build to look neat. I was a little perturbed that the GL-iNet GPIO pins are the less common 2.0mm pitch. I really wanted to mount the Teensy, with its standard 2.54mm pitch, clean on the GL-iNet. After some Googleing I found a 2.0mm to 2.54mm adapter from www.proto-advantage.com.
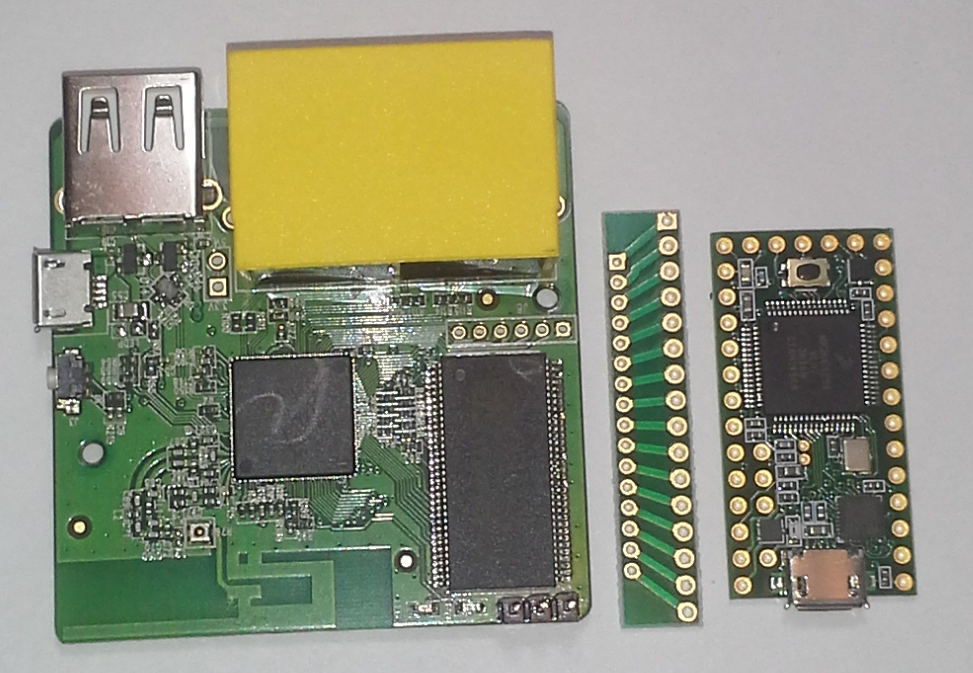
Figure 1 shows the GL-iNet (model 6416A), a Teensy 3.1, and the pitch adapter.
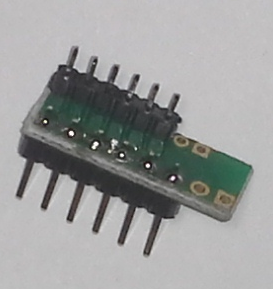
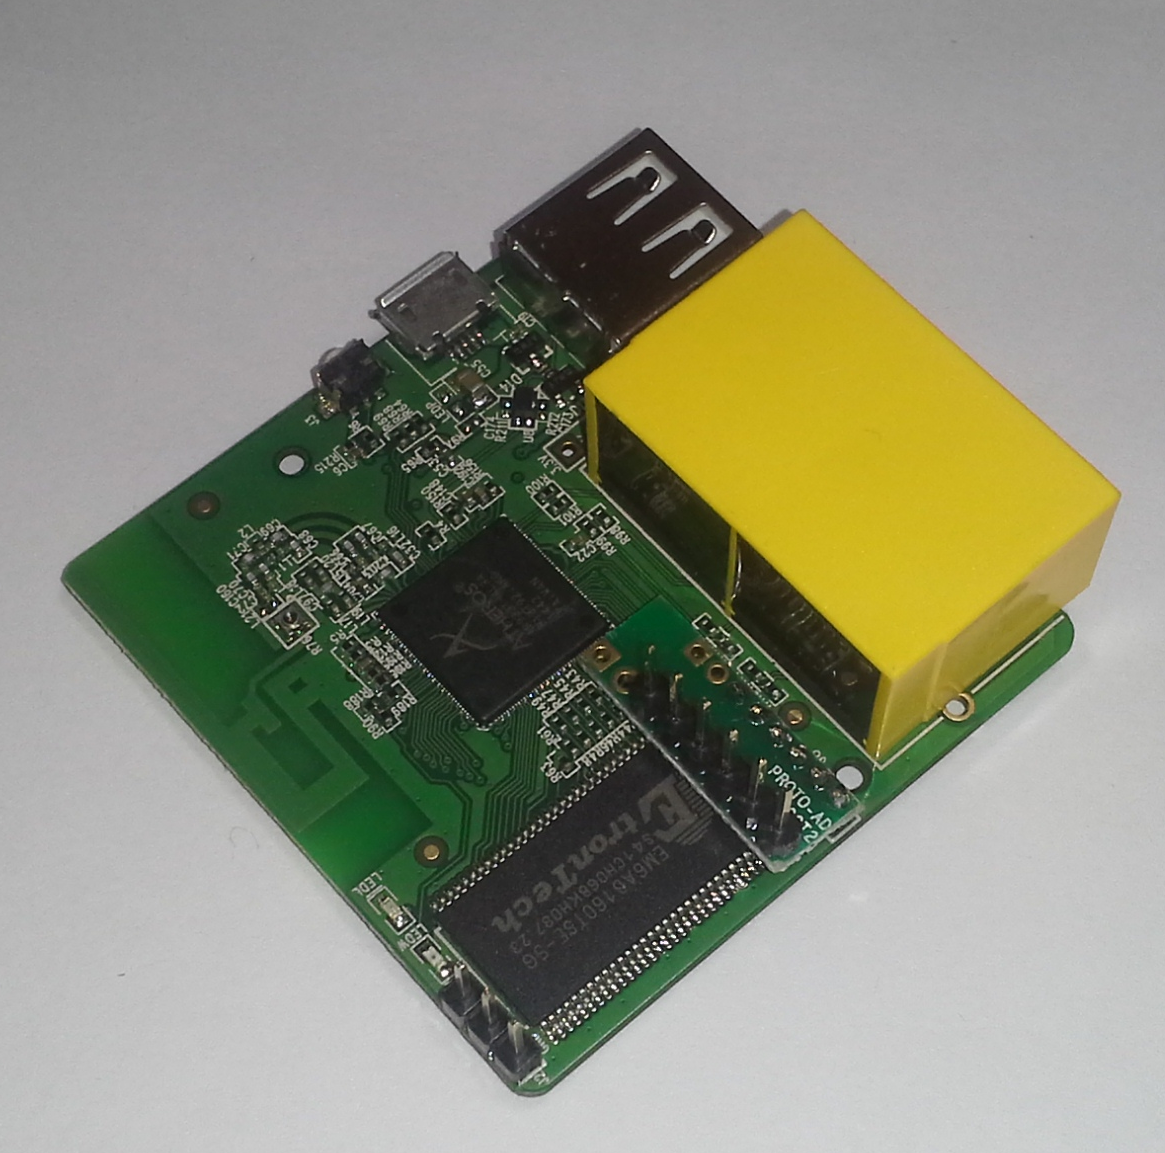
I cut the pitch adapter in half, soldiered the appropriate pins (Figure 2), and soldiered it to the GL-iNet (Figure 3).
Soldier wire to the Data – and Data + lines of GL-iNet which we will connect to the Teensy (Figure 4).
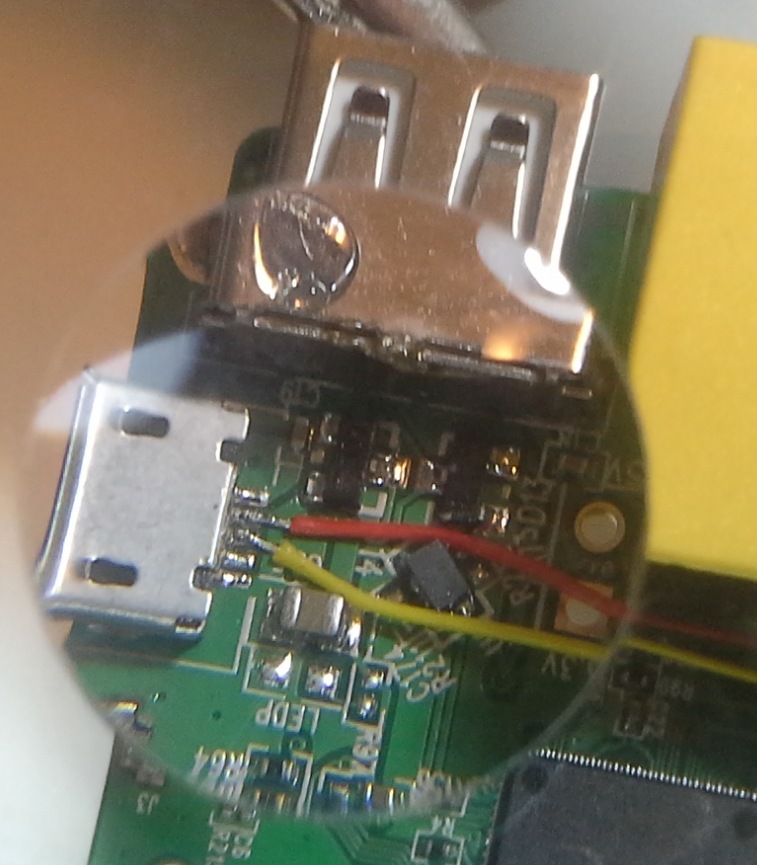
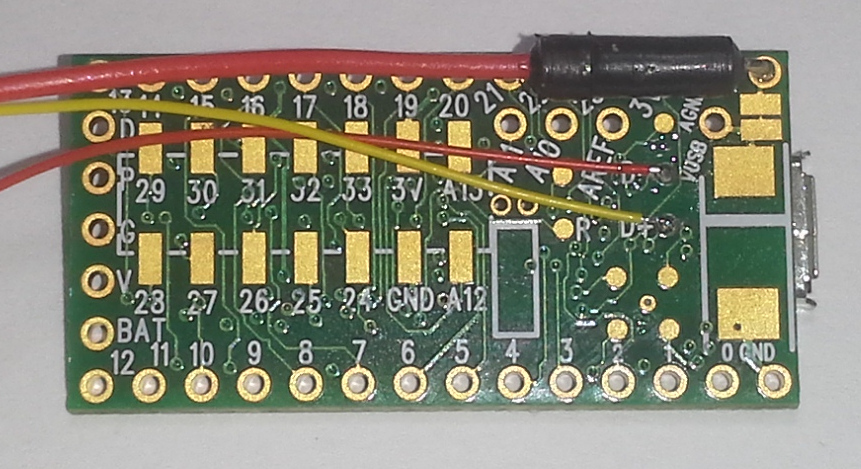
The red wire is Data- and the yellow wire is Data+. Connect them to the D- and D+ on the bottom of the Teensy 3.1. Also soldier a wire to the VCC of the Teensy which we will connect to the 5v header of the GL-iNet (Figure 5).
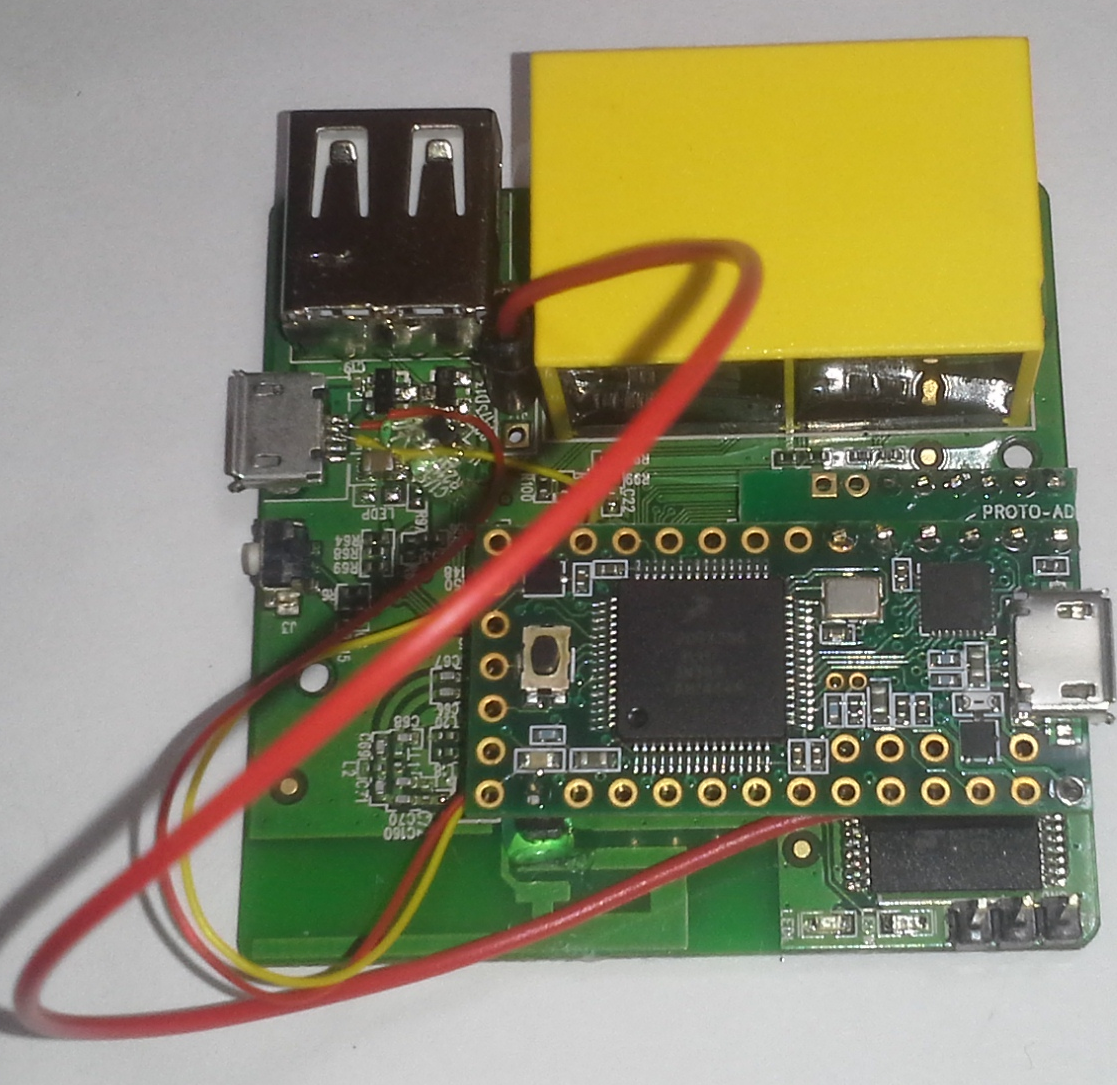
Mount and soldier the Teensy 3.1 to the GL-iNet. I also took a single header pin and hot glued it to the GL-iNet and soldiered it to Teensy pin 14. This is just to stabilize the Teensy when we press the button to upload code (Figure 6).
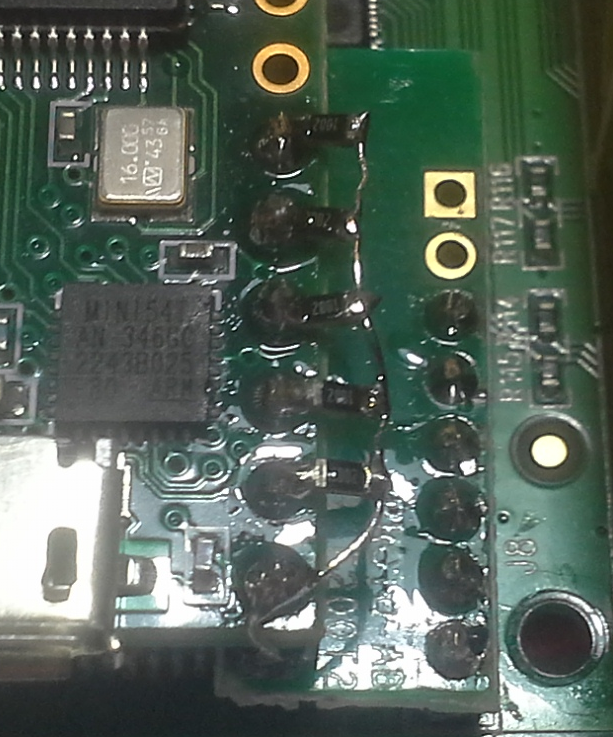
Lastly you soldier 10k ohm resistors to Teensy pins 0-4 and connect them to ground. This is the least neat part of my build as I wanted to use some SMD resistors. But it works. See Figure 7.
References
http://www.proto-advantage.com/
GL-iNet and Teensy 2.0 Build